Thursday, 18 February 2016

Femme Fatale Cosmetics 'Enchanted Desire' and Cirque Colors 'Jane on Jane Street'

Hello!

Sorry it's been a bit quiet lately. I've had a horrible cold and been too exhausted to do anything, even paint my nails!

Today I have some loosely Valentine's Day themed Nails to show you. I'd hoped to have them up in time for Valentine's but never mind! I really loved these.


Natural Lighting, Mainly to show off that shimmery copper glow!
Natural Lighting, With Flash
This is the breathtaking Femme Fatale Cosmetics 'Enchanted Desire' from the Sweet Secrets Valentine's 2016 Collection. It's so complex as usual for Femme Fatale. It's a mauve pink silky finish polish with silver hex glitter and this amazing coppery peach shimmer that frankly I want in all my polishes. I stared at these nails constantly while I was wearing them.This was three easy coats.

Natural Lighting, Shade
Direct Sunlight for that shifty Shimmer!!
Indoor Lighting, With Flash
Natural Lighting, With Flash
For my ring finger and thumb I used Cirque Colors 'Jane on Jane Street' which is a beautiful mauve creme. These two went super well together. The formula was perfection as I've come to expect from Cirque Colors. It was so creamy and buttery. This was three super easy coats.

Indoor Lighting, More Shimmer
Natural Lighting
Natural Lighting, With Flash
For the stamping I used Sugar Bubbles 018 plate. I stamped with my Fab Ur Nails Jumbo Stamper and Emily de Molly 'Rose Gold' stamping polish. All three worked beautifully and I love the Rose Gold to match with the shimmer.

Natural Lighting
Shade
Direct Sunlight
I topped it all with HK Girl Top Coat to make it all glossy and bring out that beautiful shimmer even more!

Natural Lighting
Direct Sunlight
Natural Lighting
I LOVE 'Enchanted Desire' I nearly didn't get it as the swatches made it look quite purple. I adore the pink mauve that it was in real life and that shimmer really is beautiful. What do you think?

Some stockists are still awaiting this polish so get it if you can as it's LE and won't be restocked!

Thanks for visiting,

Have a lovely day,

Helen xx

Monday, 8 February 2016

ILNP 'Ski Lodge' and 'Empire' featuring Hehe Stamping

Hello!

Still no Nail Mail (Double Boo!) but today I do have some beautiful ILNP polishes to show you.


Natural Lighting
Indoor Lighting, With Flash
ILNP 'Ski Lodge' is a gorgeous forest green. This is part of the ILNP Winter 2015 collection. It has so much depth and is so sparkly. It really is like having a forest on your nails, you know those gorgeous pine ones you see in pictures with mist and snowy backdrops. This was three easy coats.

Indoor Lighting, With Flash
Natural Lighting
I paired it with ILNP 'Empire' as an accent nail. ILNP 'Ski Lodge' has some gold micro flakes in it so this was immediately what I reached for. This is part of the ILNP Holiday 2015 collection and also has the ILNP Precious Metals finish which I just can't get enough of. It's a beautiful pale gold with silver flakies and holo. This was so sparkly as well. This was just three easy coats.

Natural Lighting
Indoor Lighting
Natural Lighting
For my stamping I used Hehe Stamping plate 005 from the Superheroes plus collection. I really like these geometric lines and felt it wasn't so much that it would take away from the beautiful 'Ski Lodge'. I used my Fab Ur Nails Jumbo Stamper and Coloralike 'Golden Queen' Stamping polish to stamp with. This was my first time with 'Golden Queen' and it was perfection!

Natural Lighting
Indoor Lighting
Indoor Lighting, With Flash
It was all topped off with HK Girl Top Coat. These nails were so sparkly I kept finding myself staring at them. ILNP really do make some amazing polishes! What do you think?

Thanks for visiting,

Have a lovely day,

Helen xx

Wednesday, 3 February 2016

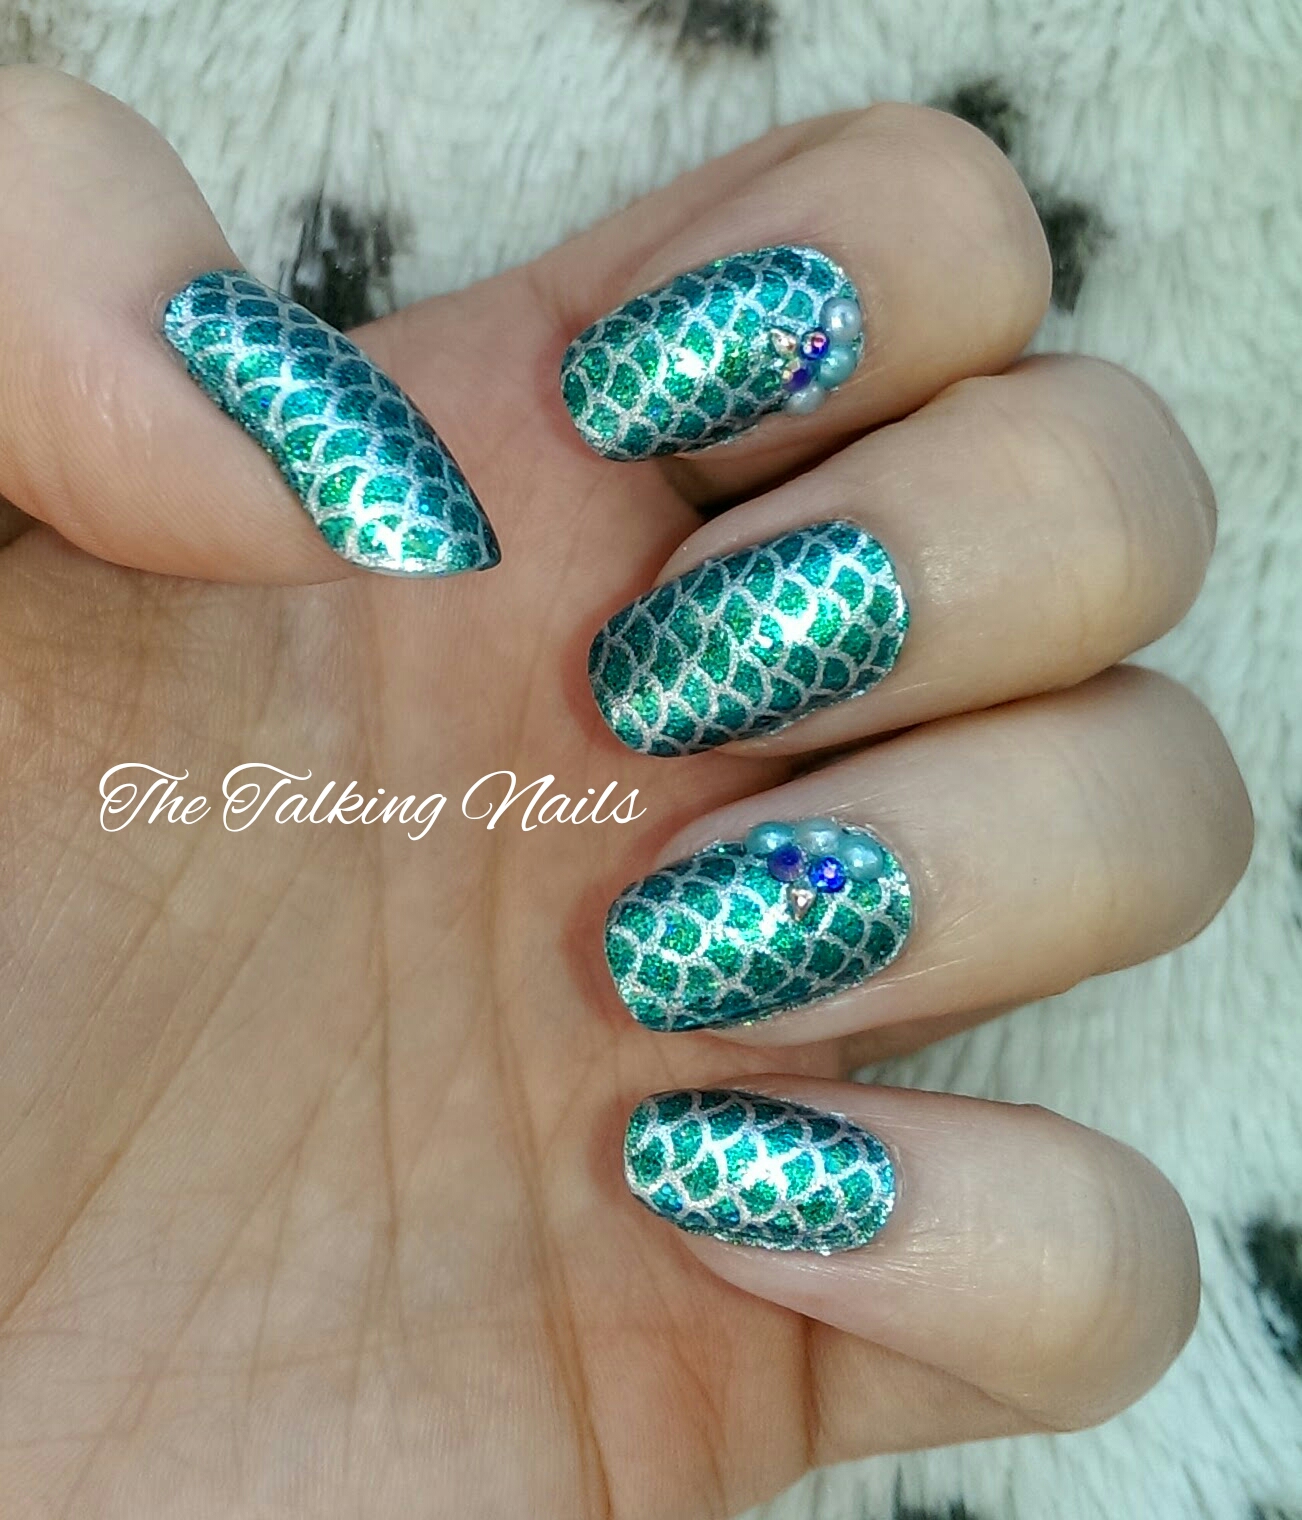
Mermaid Nails featuring Femme Fatale Cosmetics 'Jewels from the Deep'

Hello!

I have my first Mermaid nails to show you today! This is a nail art I've always wanted to try and when I reached for Femme Fatale Cosmetics 'Jewels from the Deep' I knew today would be the day!

Natural Daylight
'Jewels from the Deep' is a gorgeous mix of blue, teal, turquoise and green flakies and green microglitter in a tinted blue shimmer base. (So Complex!) It creates this gorgeous sea on your nails and the name is so fitting! It's from the Femme Fatale Cosmetics 'Midsummer Nights Dream' collection. It has a gorgeous green to blue shift in different lighting thanks to the flakies. It's simply beautiful. This was three easy coats.

Natural Daylight
Indoor Lighting with Flash
For my mermaid nail art I used Hehe stamping plate 005 from their core collection for the scale design. I stamped with Color Alike 'Silver King' stamping polish. I purchased this recently along with all the other Color Alike stamping polishes through the Etsy shop 'B. Loves Plates'. They have a huge range of the Color Alike stamping polishes as well as their own stamping plates and stampers. Well worth a look! As my first try with these stamping polishes I was super impressed. I'm looking forward to trying out the rest of my purchases and stamping in more than black and white! Hooray!  

Natural Daylight
Indoor Lighting with Flash
I used my new Fab Ur Nails Clear Jelly Stamper to stamp with as I wanted my Scales to be straight. I was so happy with how these turned out and hopefully this will be the end of my wonky stamping! I did a mini review of the stamper in my Nail Mail Monday post here. As you can see the results were fantastic. It picked up really well and I didn't have any issues.

Natural Daylight
Natural Daylight with Flash
I then added some studs that I purchased from Emily de Molly. Hayley does a whole host of different studs and ships them worldwide. I used some clear polish to stick them on. This is all topped off with HK Girl Top Coat. I am so impressed that I didn't loose one stud in the whole week plus I wore these.

I hope you love these as much as I do! What do you think of the new shorties by the way? Let me know in the comments!

Thanks for visiting,

Have a lovely day,

Helen xx

Monday, 1 February 2016

Galaxy Nails 'How To' (Picture Heavy!)

Hello!

So I've been very conservative with my nail polish buying this week and had no nail mail (Boo!) Instead I present you with this!!!

Today I have a post of EPIC proportions for you!! Galaxy Nails is something I've always wanted to try but felt a bit intimidated at how amazing everyone else's looked. But, with Star Wars on the way (Yes this post is very late) I used the Force and am so super proud with how these turned out. Hence why I couldn't resist taking pictures of them at every turn and this post could be made into a moving picture animation! I hope you love these as much as I do!


For my base I used Foxy Paws Polish 'Black Hole Sun'. A gorgeous black holographic. This was just two easy coats and no top coat!


My next step on the road to my nails resembling a galaxy was the sponging stage. I cut up some make up sponges and started with a white sponged line diagonally across my nail. I alternated the direction of this for each nail as I went along. I used my BK Matte White Polish from the Born Pretty Store but any white with good opacity would have been fine. I used tweezers to hold the tiny bits of sponge so I could get a smaller surface area of sponge to work with. And you don't want sponge messing up your other hand nails!  


I then added the sponged colours one at a time. I sponged them along the same direction as the white either side of the line. I used Virtuous Polish 'Passover' (the bright purple), 'Temperance' (the dark blue)' and 'Deborah' (the light blue).


I then went over any bits with the sponge and colour needed that I felt needed to pop more. It all dried super quick as the sponged layer is very thin. 


After this I then used my white polish again to add stars to my pointer and ring finger. I used a generic thin nail art brush to do the lines. 


I then added the small dots using my white polish with a dotting tool to create more twinkly far away stars.


I then added some hex glitter. I put a silver hex glitter in the middle of my big stars. I got these out of my Cirque Colors '1999' but any generic silver hex glitter would do. I then added a couple of hex glitters in a navy and purply maroon out of Rimmel 'Bedazzle' glitter top coat. I thought these went well with my colour scheme and added a bit of extra sparkle.


I then added ILNP 'My Private Rainbow (X)' as a top coat to make it holo. Because galaxies need holo.


It was all topped off with HK Girl Top Coat to protect the Galaxy as the ILNP 'My Private Rainbow (X)' was super glossy anyway.


I would also like to take a minute to praise my Uber Mat. Look at that mess. It made it so much easier knowing I could just leave sponge pieces and mess lying around and not be dreading the desk cleaning later!


Phew! That was long. I loved these nails and was very sad to take them off. I hope you enjoyed this post. If you have any 'How To' questions let me know in the comments! 

As always thanks for visiting and congratulations for making it all the way to the end!

May the Force be with you,

Have a lovely day,

Helen xx